
Shelf Mushrooms: Brackets, Pores, Wood, and Growth Pattern
Use visible clues, context, and a comparison workflow to evaluate shelf mushrooms safely; learn which features matter and how to use them with Fungio.
Quick answer for shelf mushrooms
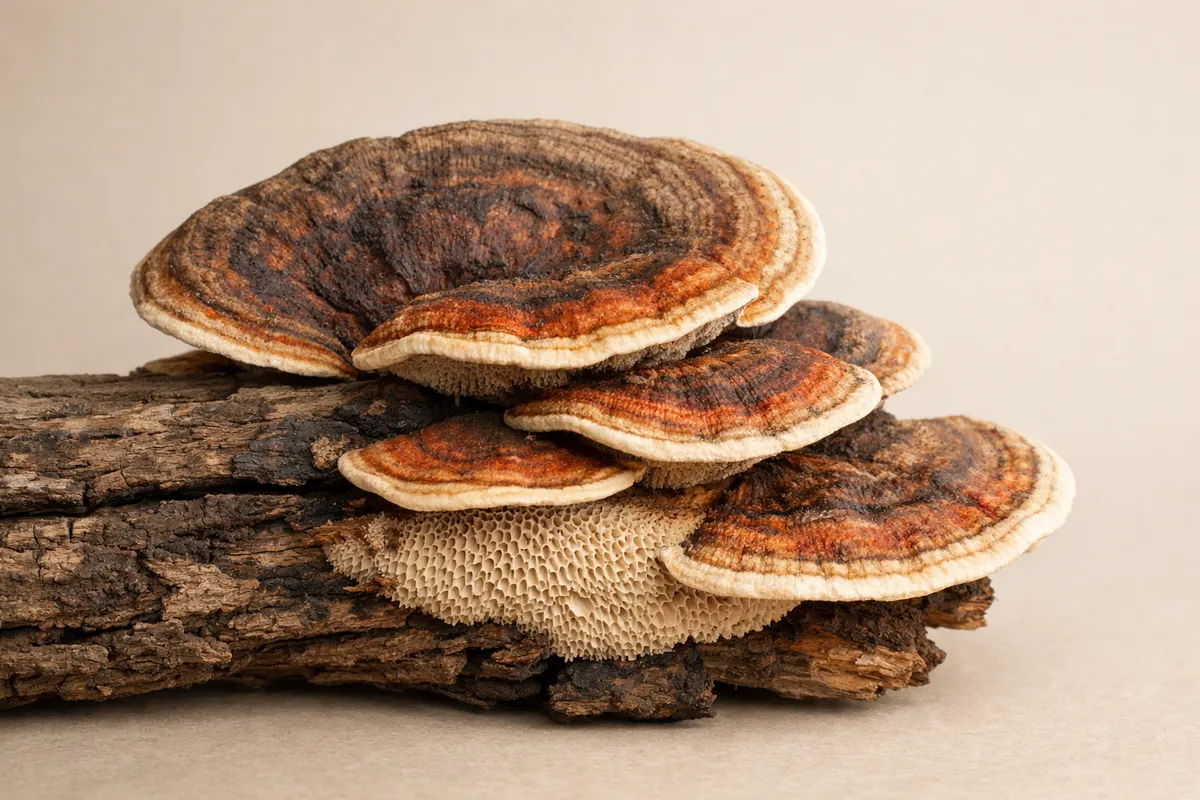
Shelf mushrooms are bracket-like fungi that grow on wood and often show layered caps or overlapping tiers. The most reliable clues you can see in a typical phone photo are attachment to wood (standing or fallen), the cap profile (brackets, semicircular tiers, or shelf stacks), and the underside structure — pores, gills, or smooth surfaces — because those features reflect growth habit, not fleeting color.
When you inspect a specimen, prioritize structural clues: Is it fused to wood without a distinct stem? Does the cap form a flat shelf or a semicircular bracket? Are there visible pores, gills, or a smooth underside? These traits narrow the field far more than cap color alone, which can change with age and lighting.
Practical next steps: photograph the cap from multiple angles, include the wood or substrate in the frame, make a close-up of the underside, and note whether the fungus is solitary or in tiers. Use those photos and notes as the basis for comparison; treat any app result or reference as a starting point, not a final identification.
- Strongest immediate clues: attachment to wood, cap shape (bracket vs. cap-on-stem), underside type (pores vs. gills), and growth pattern (single bracket, overlapping tiers, or crust-like).
- Less reliable on its own: cap color, surface texture alone, or smell from a single photo.
- If children, pets, or household members are at risk, separate the specimen from common access areas and take clear photos for further research.
Strongest visual clues
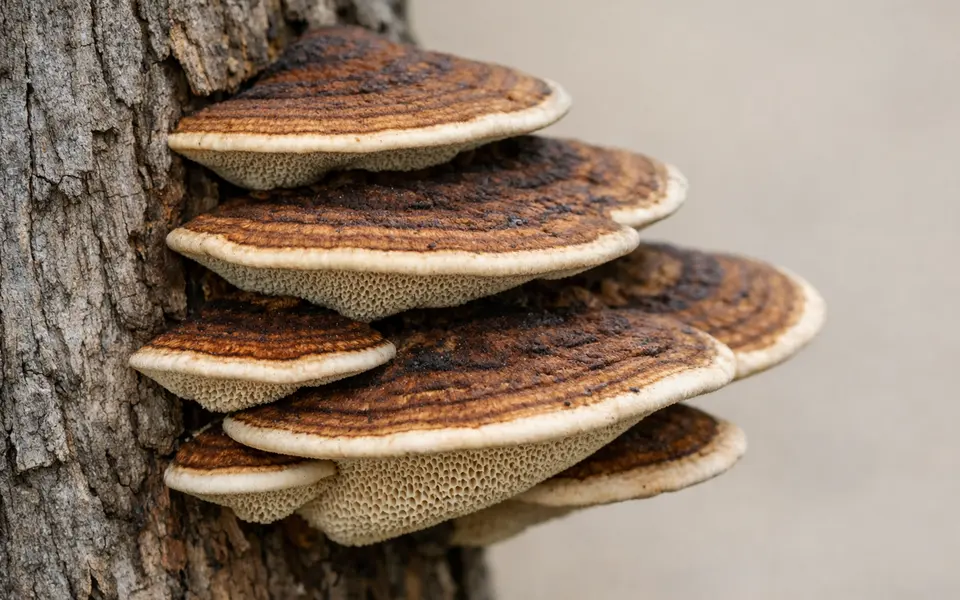
Start with substrate: shelf mushrooms almost always grow on wood — living trees, dead logs, stumps, or buried roots. A photo that clearly shows the fungus attached to wood is immediately more diagnostic than one that isolates the cap on a lawn. Note whether the wood is alive or dead; some bracket species prefer dead, rotting wood while others infect living trees.
Cap shape and arrangement are durable, camera-friendly clues. Brackets tend to be semicircular or fan-shaped and may form layered shelves along the trunk or log. Look for consistent shape across individuals: multiple overlapping tiers often point toward polypores or similar shelf-forming groups, while solitary semicircles could be an oyster-like fungus.
Underside anatomy is critical. Many shelf fungi have pores (a sponge-like underside), which appear as small round holes or tubes in close-up photos. Others have gills or a smooth underside. A clear macro photo of the underside — taken with even light and steady focus — often separates broad groups and cuts the candidate list dramatically.
Margin and attachment: observe whether each shelf is directly attached, with a broad base, or if it has a narrow point of attachment. Some shelf fungi fuse across the wood and lack a distinct stem, while others have short stems or distinct attachment points. The margin (edge) of the cap — thin, thick, zoned, or hairy — is another feature that survives different lighting and helps narrow matches.
Contextual signs: look for fruiting pattern (single, clustered, overlapping), decay on the wood (white rot vs. brown rot signs), and seasonality if known. Also photograph scale — a coin, ruler, or finger in the frame helps judge size, which is informative for many shelf-mushroom groups.
- Substrate clarity: show the wood and point of attachment in at least one photo.
- Cap profile: semicircular bracket, fan-shaped, shelf stack, or overlapping tiers.
- Underside type: pores (tubular), gills, or smooth surface — capture a close-up.
- Margin and attachment: broad, fused attachment vs. narrow point or short stem.
- Fruiting pattern and scale: solitary vs. tiers, and a size reference in the image.
Weak signals
Color is tempting to use because it stands out in photos, but it’s a weak signal on its own. Cap pigments fade with age, sun exposure, and moisture; camera white balance can shift hues wildly. If color appears strongly diagnostic in your reference, confirm it against structural clues before trusting a match.
Surface sheen, gloss, or wet/dry appearance often reflects recent weather rather than species. A glossy-looking bracket after rain might look completely different a few hours later. Similarly, light reflection can create the illusion of bands or zones that aren’t structurally present.
Single-angle photos hide critical features. A top-down shot can miss the underside entirely; a side shot may obscure how the bracket fuses to the wood. Avoid basing conclusions on one image — capture multiple views to verify any weak signals you think you see.
- Cap color alone — especially subtle shades — is unreliable.
- Specular highlights and shadows can mimic zonation or texture.
- One-angle photos omit attachment, underside, or growth pattern details.
- Smell, taste, or texture reported without professional testing are not conclusive; do not taste unknown fungi.
Comparison workflow
Use a stepwise comparison to move from broad groups to narrower possibilities. First, confirm the fungus is wood-associated and bracket-like. Second, classify the underside (pores, gills, or smooth). Third, compare cap arrangement and margin details. Each step removes large sets of lookalikes and focuses your search on plausible species or groups.
Practical example: you photograph a semicircular shelf on a dead oak. Close-up shows a porous underside. That combination rules out gilled shelf lookalikes and suggests polypores or bracket polypores. Next, check margin thickness and whether the pore surface bruises or changes color when handled; these secondary clues help separate similar polypores.
When comparing to references, match at least three independent clues before leaning toward a candidate: substrate + underside type + cap arrangement is a strong trio. If two references fit the structural clues equally well, use size, spore-print color (if safe and practical), and seasonal notes as tie-breakers — but only after you’ve recorded images and avoided risky handling.
- Step 1: Confirm wood substrate and attachment style in a wide shot.
- Step 2: Capture a macro of the underside — pores, gills, or smooth surface.
- Step 3: Compare cap shape, margin, and growth pattern across photos.
- Require at least three matching clues before treating a reference as likely.
- If uncertainty remains, treat the result as a research note and avoid risky interaction.
App workflow
After you’ve captured the essential photos and notes, use an identification app like Mushroom Identifier: Fungio as a first-pass research aid. Upload or scan the photos on your phone, but keep in mind the app’s suggestions are hypothesis-generating: they narrow possibilities for you to evaluate, not final verifications.
When you get candidate matches, compare each suggested species back to your three core clues — substrate, underside type, and cap arrangement — rather than relying on color or a single strong match score. Use the app’s matched images only to find reputable reference photos and descriptions that align with what you photographed.
If results are uncertain or the mushroom could pose a risk to children or pets, mark the identification as tentative and seek local expert resources (mycological societies, extension services, or certified identifiers) for confirmation. Keep your original photos and notes handy — experts evaluate images and context together, not a single isolated shot.
- Start with the widest-angle photo, then add underside and scale shots when scanning.
- Treat app suggestions as starting points; validate matches against structural clues.
- Use app matches to find reference images and literature, not absolute answers.
- For safety concerns, preserve photos and consult a local expert rather than relying solely on app output.
Related guides
Check visible clues, then use the app as a first pass
Photograph the shelf mushroom’s attachment, underside, and overall growth pattern, then run those photos through Mushroom Identifier: Fungio to gather candidate matches. Treat app results as research notes and seek local expert verification for anything that could affect safety.
Take the next step →Frequently asked questions
What photo angles are essential for identifying a shelf mushroom?
Take a wide shot that shows the fungus on its wood substrate, a side view showing cap profile and attachment, a close-up of the underside (pores, gills, or smooth), and at least one photo with a size reference like a coin or finger.
Can I tell if a shelf mushroom is poisonous from a photo?
No. Photos can narrow possible species but cannot confirm toxicity. Use visible clues to generate candidates, then treat any potentially hazardous match as unverified until confirmed by an expert.
How do I distinguish polypores from gilled shelf fungi in pictures?
Polypores typically show a porous, sponge-like underside made of tiny holes or tubes; gilled fungi have blade-like gills. A clear macro photo of the underside under even light usually reveals this difference.
When should I contact a local expert instead of relying on photos and apps?
Contact an expert if the mushroom is in a place with access to children or pets, if the species appears unfamiliar and potentially hazardous, or if photo-based matches conflict. Experts consider growth context, microscopy, and sometimes lab tests that photos alone cannot provide.