Polypore Mushroom Identification
Polypore Mushroom Identification: Visual Clues & Next Steps
Learn which visible features a photo can prove for polypore mushroom identification, what an identification result includes, and practical next checks.
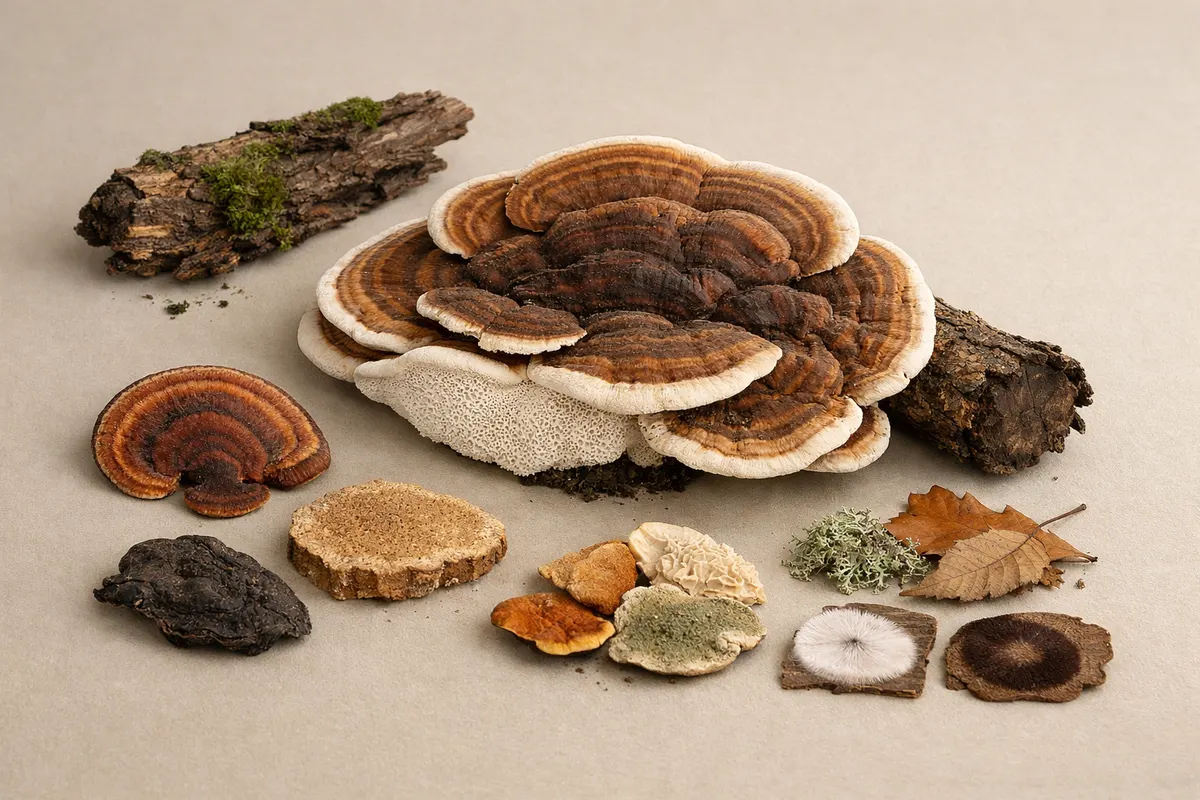
Polypore mushroom identification from a single photo can narrow a bracket fungus to a small group by visible field marks: cap shape, pore or maze pattern on the underside, substrate (wood species), and overall growth habit.
A well-framed image that shows the cap, underside (pores or mazes), and the supporting wood gives the fastest first pass. That first pass groups brackets into likely genera (Trametes, Ganoderma, Fomes, etc.) and highlights matches you can prioritize for follow-up.
Photos cannot prove microscopic features, spore color, or chemical reactions, so treat a single-photo result as a probable ID that points to the next checks rather than a final certificate of authenticity.

How identification works
Step 1
Snap a photo
Take a clear, well-lit photo of your item in the Mushroom Identifier: Fungio app.
Step 2
Get an instant identification
The app reads the visible clues and returns the closest matches in seconds.
Step 3
Review the details
Check the attributes, rarity, and estimated value range before deciding your next step.
Key visual signals to check on polypores
Polypore mushroom identification relies on a few high-value visual signals you can check on-site. Start with the underside pattern: clearly visible pores, mazelike folds, or a smooth surface strongly narrows options.
Next, note cap zonation and texture. Many polypores show concentric color bands (zonate caps) or a varnished sheen; others are leathery or woody. Banding, color contrast, and surface hairs are reliable macroscale clues.
Substrate and orientation are essential. Record whether the fungus grows on hardwood or conifer, standing dead tree or fallen log, and whether it forms shelf-like brackets, overlapping shelves, or a resupinate crust.
Preserve uncertainty: photograph the cap edge, the pore surface close-up, the point of attachment to the wood, and an overall scale reference (coin or ruler) so an identification tool can weight each signal correctly.
- Underside pattern: document pores or maze-like openings. A smooth underside can point to a different bracket-fungus group rather than a true polypore.
- Cap bands and texture: zonation, velvety hairs, crusty varnish, or woody toughness.
- Attachment & growth form: single shelf, tiered brackets, conk versus resupinate crust.
- Substrate notes: hardwood (oak, beech) versus conifer; mention if on living or dead wood.
What a polypore identification result includes
The photo tool returns a written summary, visible observations, possible matches, and suggested next steps. A species-level match is not always possible, and the tool does not promise calibrated confidence scores.
Expect explicit notes on the underside type (poroid, labyrinthine, smooth), substrate recorded from your photo, cap zoning or color bands, and a brief comparison to top lookalikes so you can see why the tool favored those matches.
The result also suggests practical next checks: which additional photos to capture (close-up of pores, cross-section, attachment), whether a spore print or microscopic check is advisable, and any immediate safety precautions.
- Possible matches with visible supporting clues and remaining uncertainty.
- Visible growth habit, plus substrate details to verify independently when the host tree cannot be identified from the image.
- Actionable next steps: which additional photos will reduce uncertainty and when to seek microscope or expert confirmation.
Polypore lookalikes and photo clues that separate them
Many polypores are mistaken for each other or for other bracket fungi. For example, thin, overlapping shelves may be Trametes (e.g., turkey tails) while thick hoof-shaped conks point toward Ganoderma or Fomes.
Close-up photos of the pore surface and cap cross-section are often the decisive evidence a tool needs to separate similar species: pore size, maze complexity, and context on the wood species are frequently diagnostic at the genus level.
If you want a focused comparison, the Mushroom Visual Checklist and the edible identification page show side-by-side examples and common confusion points; see the mushroom visual clues resource or the edible mushroom identification page for more examples.
For a documented comparison of underside features, see Missouri Department of Conservation: https://mdc.mo.gov/discover-nature/field-guide/false-turkey-tail. Never use this guide or an image match as permission to eat a wild mushroom.
- Turkey tail vs. false turkey tail: true turkey tail has pores underneath; a smooth underside supports a different match. Cap bands alone are insufficient.
- Ganoderma-like varnished conks: thick, woody, and sometimes lacquered surface.
- Resupinate crust fungi that look flat from above can be distinguished by pore density and attachment pattern.
Frequently asked questions
How do I confirm red-belted conk identification when I only have a single trunk photo?
Start by photographing the cap edge, any visible banding, and the underside if possible. Red-belted conks often show distinct reddish zonation on a woody cap; a close-up of the pore surface and a note of the host tree (hardwood vs conifer) significantly improves a candidate match. A single trunk photo can suggest the group, but adding a pore close-up and substrate note is the most reliable next step.
What should I photograph to help with oak maze gill mushroom identification near a fallen log?
Capture a close-up of the underside to show the labyrinthine (maze-like) folds, a side profile that shows cap thickness and attachment, and a wider shot that records the oak log substrate. Maze gill patterns and a clear record of growth on oak are the two strongest visual signals for narrowing candidates, though microscopic checks may still be needed for a final species-level ID.
When is turkey tail polypore identification reliable from photos in a park setting?
Thin banded shelves and a clear view of fine underside pores can support a turkey-tail candidate. A smooth underside points away from true turkey tail. Compare other features and seek expert confirmation when uncertain; a photo result cannot establish that a mushroom is safe to eat or use medicinally.
Which photos help with thin-maze flat polypore identification on downed branches?
For thin-maze flat polypores, prioritize a macro shot of the maze-like underside, a side view showing thinness and how the fruiting body adheres to the branch, and a contextual photo of the downed wood. Thin, flat, labyrinthine undersides plus the branch host are the core visible clues; once you have those images an identification tool can often exclude thick or pore-dense lookalikes.
Related guides
Try Mushroom Identifier: Fungio with your polypore photos
After you check the visible field marks above, use Mushroom Identifier: Fungio to turn those photos into possible polypore matches and targeted next checks. Capture a cap shot, a close-up of the underside (pores or maze), and a photo showing the supporting wood, then visit https://mushroomidentification.app/tools/free-mushroom-identifier to run a photo check. The tool highlights what the result used from your images and recommends follow-up photos or expert verification when uncertainty remains.