
Mushroom Species Identification: A Practical Photo-First Checklist
A photo-first checklist for mushroom species identification: visible field marks, habitat clues, lookalikes, and when to verify with experts.
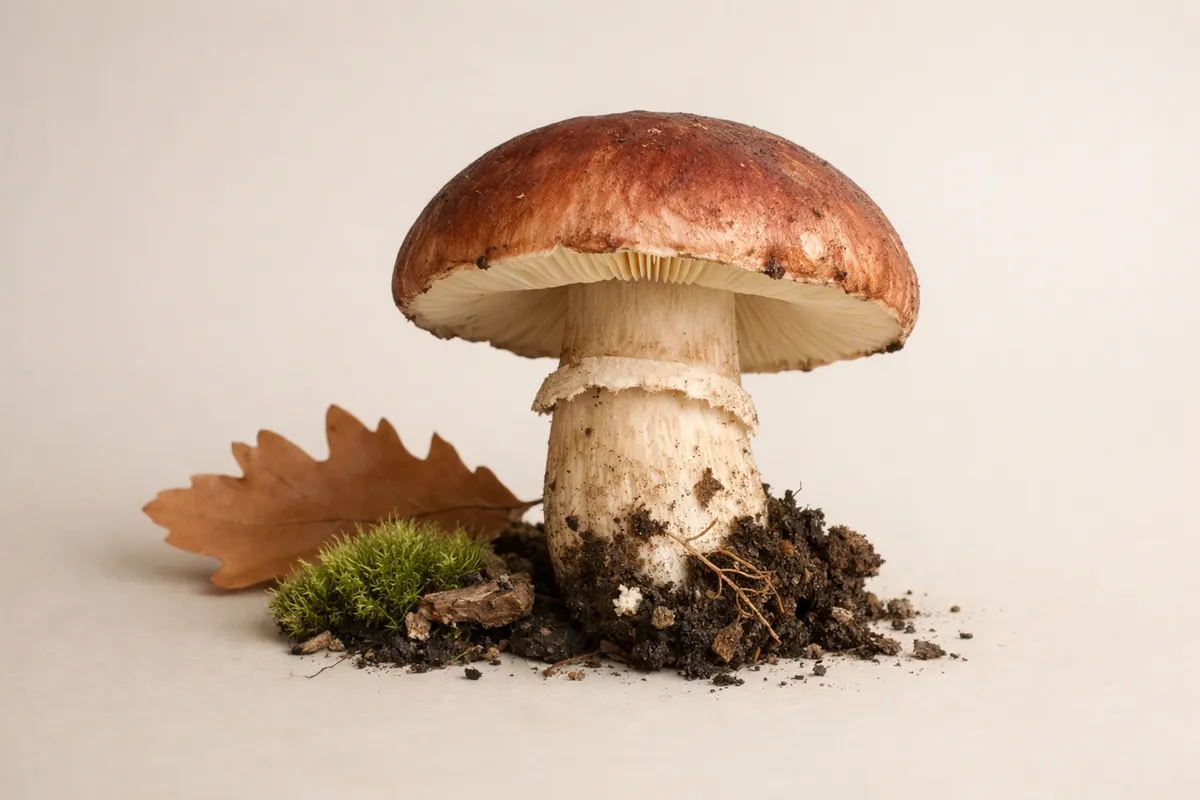
Quick answer: How to approach mushroom species identification
Mushroom species identification starts with a careful, photo-first survey of visible field marks rather than a single guess. Use clear, in-focus photos of the cap, gills or pores, stem, underside, and context (ground, nearby trees, leaf litter) and record where and when you found the fungus. With that evidence you can narrow the possibilities to a short list of candidate species or groups, but a photo-based result is rarely final unless the species has unmistakable, unique features.
Practical first checks are: cap shape and texture, gill attachment and spacing, stem features (ring, bulb, surface texture), bruising or color changes when handled, and habitat (woody log, lawn, moss, under pine). When a photo shows multiple diagnostic traits—say a scaly orange cap, decurrent gills, and a faint fruity smell—you may reach high confidence for a handful of species. If key diagnostic features are missing or ambiguous, plan follow-ups like spore prints, microscopic checks, or expert verification.
Keep uncertainty visible: photo-based mushroom identification is provisional. Use photographs and field notes to organize a candidate list and discuss it with a trusted regional expert. An app result, a visual resemblance, or a combination of image clues must not be treated as permission to eat an unknown mushroom. Where a possible identification has safety implications, leave the specimen unverified rather than turning a plausible match into an edibility decision.
What mushroom species identification actually aims to do
Mushroom species identification is the process of matching observed features of a fungus to published descriptions and known specimens. In practical field work this means converting what you can see and record—cap size, surface, gill or pore structure, stem details, smell, habitat, and season—into a shortlist of candidate taxa. For many common, distinctive mushrooms that shortlist will include one or two likely species; for cryptic groups it can include dozens.
Identification is hierarchical: you first place the specimen in a broad group (for example boletes, agarics with gills, polypores) and then compare finer traits to decide on genus and species. That process uses both visual traits and context such as whether the mushroom grows on wood or soil, whether it prefers conifers or hardwoods, and whether it fruits in spring or late fall.
Useful descriptive categories include the fruiting-body form, visible underside, substrate, habitat, and associated plants. These help you select the right part of a regional field guide and explain your observations to an expert. Keep questions about edibility separate from the visual shortlist; an apparent group match does not establish whether a particular specimen is safe to consume.
- mushroom types: record whether it is a gilled mushroom, bolete (pores), polypore, coral, cup fungus, or other form; this first division narrows the field faster than color alone.
Mushroom visual clues to check in photos
Photographs are only useful for identification if they capture a set of reliable visual clues. Start with the cap: note its diameter, shape (convex, bell-shaped, flat, umbonate), surface texture (smooth, scaly, fibrillose), and edges (striated, inrolled). A bruising color or sticky surface when wet can be highly diagnostic for some groups, so include close-up photos both before and after you handle the mushroom if safe to do so.
The underside is critical: gills versus pores versus teeth changes the identification path entirely. For gills, capture whether they are attached to the stem (adnate, decurrent, adnexed), how crowded they are, and whether they fork. For boletes, photograph the pore surface and try pressing lightly to check for blue bruising. Include a clear photo of the stem showing any ring, volva, bulb, surface texture, and whether it is hollow or solid if you can safely check.
Spore color can often be read from a spore print and is a decisive clue for many genera. If a spore print is not yet available, try to photograph a mature specimen where the gills are shedding spores—the color dusting underneath can be a hint. Other context photos—mycorrhizal partner trees, surrounding ground cover, and any nearby decaying wood—help eliminate species that prefer specific hosts or substrates.
- cap: shape, size with scale (coin or ruler), surface texture and any margins or warts
- underside: gills/pores/teeth, attachment, spacing, color
- stem: base shape, ring(s), volva, surface texture, bruising
- context: substrate (soil/wood), associated trees, exact GPS or town, and season
- handling: any onion/almond/chemical odor noted, and immediate color change when bruised
Step-by-step workflow to identify a mushroom from photos
1) Photograph deliberately: take a set of at least five images—wide shot showing surrounding habitat, top of cap with scale, close-up of cap surface, clear shot of underside, and stem base. Label each photo with location and timestamp. Poor lighting and blurry close-ups remove diagnostic textures, so use natural light and steady your camera.
2) Do an initial sort: decide whether the specimen is a gilled mushroom, a bolete (pores), a polypore, or something else. That single decision redirects which field guides and keys you should consult. For example, a pore surface points you toward boletes and polypores; teeth or spines point toward hydnums and similar groups.
3) Compare visible field marks to references. Use multiple sources: a regional field guide, a specialist blog post (for example, the site’s Mushroom Visual Checklist), and a curated photo database. Focus on combinations of traits rather than single features—cap texture plus gill attachment plus habitat yields more confidence than color alone.
4) Use simple follow-up tests if needed and safe: take a spore print on white and black paper to reveal spore color, note bruising color, and smell the mushroom gently. If uncertainty remains, assemble the photos and notes and consult an experienced local mycologist, a university extension, or a reputable online community that requires photo and habitat details. Treat these results as a confirmation step rather than a final verdict for risky uses.
- Photograph deliberately: wide shot, cap top with scale, close-up cap surface, underside, stem base.
- Sort into broad groups first: gills, pores, teeth, or other.
- Compare combinations of traits across multiple trusted references.
- Follow-up tests: spore print, bruising, smell; then seek expert confirmation if needed.
Examples
Example 1 — Pale mushroom with a ring and a cup-like structure at the base: record the cap, underside, stem, and base carefully and compare the complete set with a regional guide. These features can raise important lookalike questions, but a photograph does not settle the species or edibility. Keep the specimen unverified and seek appropriate expert assessment rather than acting on a familiar-looking cap or a single prominent feature.
Example 2 — Yellow mushroom with ridges or gill-like structures underneath: a clear underside view may help an expert compare candidate groups. Photograph the overall form and underside, and record the substrate and location rather than treating one ridge pattern as decisive. The distinction between a plausible chanterelle-like shape and another yellow mushroom is not a photo-based food-safety test. A visual shortlist remains provisional even when a guide contains a similar photograph.
Example 3 — Pored mushroom showing blue discoloration: document the visible pore surface and any color change that is already present, along with the cap, stem, base, habitat, and time of observation. Pores or blue bruising do not establish that the mushroom is edible, nor do photographs sort it reliably into safe and unsafe groups. Use dedicated regional references to organize possible matches, then obtain expert assessment when identification matters. Do not use the app, a photograph, or a bruising reaction to decide to eat it.
Example 4 — Mushroom with a folded or pitted cap: an overall photograph may suggest a morel-like group, but shape and an apparent internal cavity are not sufficient confirmation of species or edibility. Record the visible details and context without treating a cut surface as a safety certificate. Similar names and broad visual resemblance can conceal important differences. Keep an unknown specimen out of any meal and leave the identification provisional until appropriately assessed.
- Photograph the full specimen and habitat rather than relying on cap color.
- Underside details can help an expert compare candidate groups; they do not establish edibility.
- Pores, bruising, ridges, and hollowness are observations, not safe-versus-toxic tests.
- Keep unknown mushrooms unverified and do not consume them based on an app or photograph.
Limitations: When photos aren’t enough for confident species ID
Photos are powerful but imperfect. Several species are cryptic—meaning they look nearly identical to another species in the same genus but differ microscopically or chemically. Without a spore print, microscopic spore shape, or chemical tests, you may only be able to reach a genus-level or group-level identification. Always mark photo-based IDs as provisional in your notes.
Environmental wear, age, and local variation complicate readings: old, sun-bleached, insect-eaten, or mold-covered specimens hide diagnostic colors and textures. Seasonal and geographic variants also exist; the same species can look different in a coastal rain forest versus a dry inland forest. Those variables increase the importance of habitat photos and precise location data.
Keep identification and eating decisions separate. Neither one photograph nor a complete photo set establishes that an unknown mushroom is safe to eat. Similar-looking specimens may differ in ways an image cannot resolve. Consult a trusted, qualified regional expert when identification has safety implications, and keep an unverified specimen out of any meal. A candidate list is useful for discussion, but it is not a food-safety clearance.
When to seek higher-level verification: if the mushroom could be confused with a known toxic species, if it belongs to a genus with microscopically defined species, or if the specimen will be used for consumption, sale, or research. In those cases, plan for spore prints, microscopy, or DNA sequencing, and document your process so an expert can reproduce your observations.
- Cryptic species often require microscopy or chemistry to separate from lookalikes.
- Old or damaged specimens reduce photo reliability—always photograph multiple fresh examples if possible.
- Photo identification does not establish edibility; seek appropriate qualified expert assessment.
- Use spore prints and microscopic features when a species-level ID matters for safety or commerce.
Related guides
Want a first-pass ID from your photos?
If you’ve collected clear photos and notes, use this site’s quick photo-identification tool for a first-pass suggestion that pairs with the field checklist above: https://mushroomidentification.app/tools/free-mushroom-identifier. Treat any automated suggestion as provisional—use it to guide follow-up checks like spore prints or expert consultation, and consult the site’s identification pages for detailed next steps before making safety decisions.
Take the next step →Frequently asked questions
Which mushroom identification guide should I use when I only have smartphone photos?
Start with a reputable regional field guide that covers local species, then cross-check photos against curated online photo databases and specialist pages. For a photo-first workflow, use resources that include many labeled photographs and habit descriptions rather than just line drawings. Save your labeled photos and notes so an expert can verify them later. On this site, the Mushroom Visual Checklist page is a helpful companion to photo comparison because it lists the same visible clues you should capture.
How reliable is a species ID based on a single clear photo?
A single clear photo can often point you to a genus or a small set of candidate species, especially when the specimen has striking, unique features. However, single photos routinely miss crucial details—spore color, base features, or microscopic traits—that separate lookalikes. Treat single-photo IDs as provisional: they are useful for narrowing the search but not for safety decisions like eating. Whenever possible, follow up with spore prints, habitat notes, and expert verification.
What photos should I take in the field to get the best species ID?
Take at least five images: a habitat-wide shot, top of the cap with a scale object, a close-up of the cap surface, a clear image of the underside (gills, pores, or teeth), and a photo of the stem base (dig gently if needed to show a volva). Label each photo with date, time, and location. If safe and relevant, include a cut view to confirm hollowness or internal coloration and record any immediate color change where bruising occurs.
Can photos reliably separate edible from poisonous lookalikes in the field?
No. Photographs can document features and support a candidate list, but they cannot reliably establish that an unknown mushroom is safe to eat. Toxic lookalikes can share visible traits with edible species, and an app label or a similar field-guide image does not resolve those risks. Keep the result provisional and consult an appropriate regional expert. Do not use photo identification as permission to consume a mushroom.