
Mushroom Types: How to ID Common Fungi by Field Marks
Practical guide to mushroom types with visible field marks, habitat cues, and safe next checks. Learn which visual clues matter and when to seek verification.
Fast answer: how to recognize mushroom types
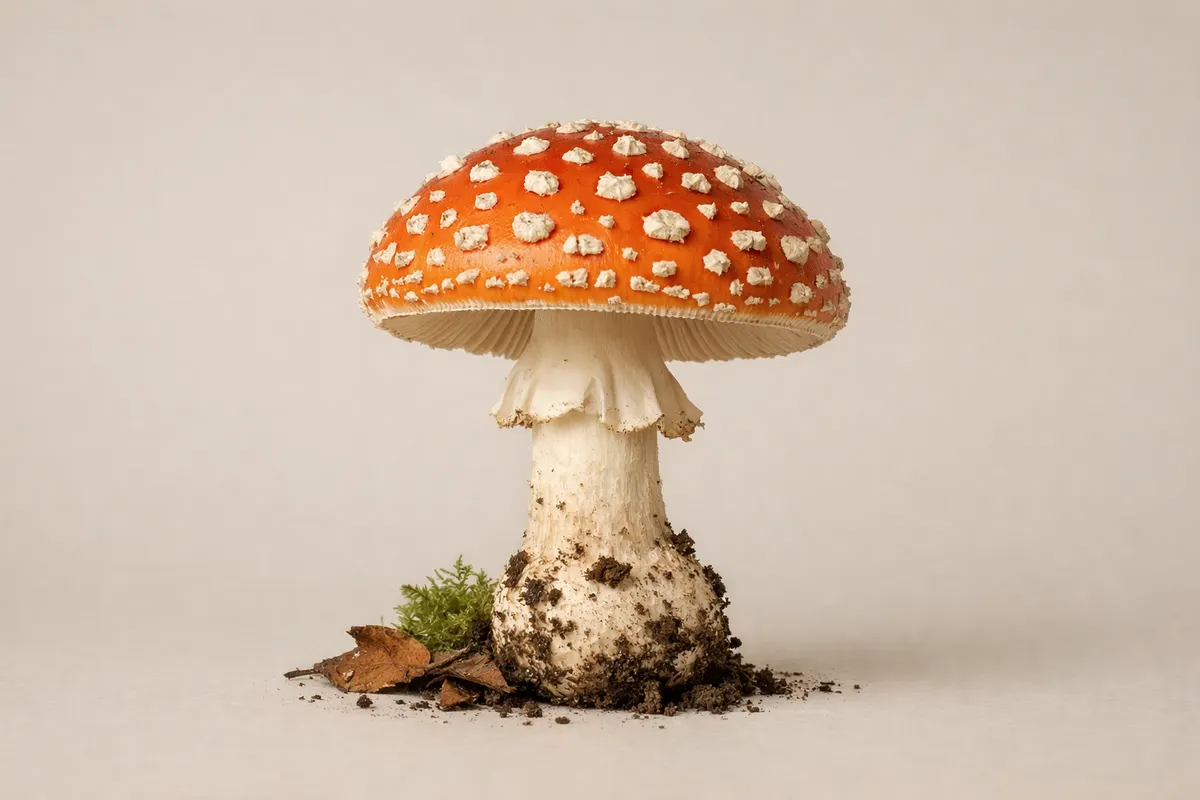
Mushroom types are best separated by a small set of visible field marks: cap shape and surface, gill or pore structure under the cap, stem features, spore print color, and where the fungus is growing. A quick visual check that includes one clear top view, a photo of the underside, and a picture of the stem where it meets the ground will let you narrow many mushrooms to a handful of likely groups—boletes, agarics (gilled mushrooms), polypores, cup fungi, and puffballs, for example.
Despite how helpful photos can be, some identifications require multiple checks. Color and texture fade with age; bruising, smell, and microscopic spore detail change the picture; and several edible and toxic species are near-identical to each other. Treat a single photo as a first pass to sort possibilities, not a final verdict.
What 'mushroom types' refers to in field identification
When people ask about mushroom types they usually mean practical groups a forager or naturalist can tell apart in the field: gilled mushrooms (agarics), boletes with pores, jelly fungi, morels and false morels, polypores on wood, and sac fungi like puffballs. Each group shares a set of visible features that are reproducible in photos and simple notes, and that grouping helps narrow the number of candidate species from hundreds to a few likely genera.
Grouping by type is not taxonomic precision; it’s a triage step. For example, calling something a bolete (a mushroom with a spongy pore layer instead of gills) tells you important risks and tests to run—pore color, whether the flesh bruises blue, and whether the stem has a reticulation or bulb. Those checks point you toward smaller, literature-backed lists of species to compare.
Mushroom visual clues to check first
Start with five visual clues that most reliably separate mushroom types: cap shape and surface (viscid, scaly, smooth), underside structure (gills, pores, teeth, ridges, or smooth inside), stem characters (ring, volva, base bulb, texture), flesh reactions (bruising or color changes), and habitat/substrate (soil, moss, wood, dung). Photograph or note each item in turn. If you can, include scale—use a coin or a thumb to show size—because absolute dimensions narrow options quickly.
Cap details: note whether the cap is convex, depressed, funnel-shaped, or cup-like; whether it has a margin that inverts as it ages; and whether the surface glistens or is dry and scaly. Underside structure: a gilled mushroom with free gills points toward agarics, while a spongy pore surface indicates a bolete or polypore. These differences are often decisive at the type level.
Stem and attachment: look for a partial veil (ring), a volva or basal sac, fibrils, and whether the stem is hollow. Stem texture and ornamentation—like a reticulated net pattern on some boletes—are high-value clues. If the stem base is buried, carefully dig around it to reveal any bulbs or volvas rather than tearing the specimen free.
Habitat and timing: record the substrate and surrounding trees. Mycorrhizal mushrooms often grow at the bases of particular tree species, saprotrophs grow on wood or leaf litter, and coprophilous species appear on dung. Seasonality and local climate are additional context that reduce candidate lists; a morel-like mushroom in early spring has a different set of likely species than a similar-looking cap in late summer.
- Cap: shape, surface texture, margin behavior, and any distinctive color zones.
- Underside: gills versus pores versus teeth versus smooth poreless flesh.
- Stem: ring, volva, base shape, hollow vs solid, surface ornamentation.
- Bruising: note immediate and delayed color changes after handling.
- Substrate: soil species vs wood-rotting vs dung-associated mushrooms.
- Scale: include a ruler or coin in photos to show size.
Step-by-step workflow to narrow mushroom types
Work through a checklist in a consistent order so you don’t miss subtle but decisive clues. First, photograph from above to record cap color and pattern, then take a clear photo of the underside and the point where the stem meets the ground. Next, make notes or photos of the stem length and any ring or bulb structures. Finally, record the substrate and immediate habitat (type of tree, ground cover, and moisture). A consistent routine improves your ability to compare specimens across days and sites.
Second, perform a few non-destructive tests that are safe and reversible in the field. Smell the fresh cap and the cut flesh—some mushrooms have a distinctive fruity, radish-like, or mealy odor. Press or bruise a small area of the cap or stem to reveal color changes; photograph bruising as it develops. If safe to do and if you need extra precision, collect a spore print by placing the cap gill-side down on white and dark paper to reveal spore color after several hours.
Third, use targeted comparisons to rule out large groups. If the underside is a pore surface, check for bruising and stem reticulation to separate boletes from polypores. If the mushroom has a volva at the base, treat Amanita-like species as high-priority for verification due to toxic lookalikes. For cup- and sac-like fungi, breaking the fruiting body to inspect internal chambers can be diagnosing—puffballs show uniform, solid interior early in development, while immature agarics will show primordia of gills.
Fourth, assemble candidate species and test them against reliable references: field guides that cover your region, vetted online keys, or an experienced local mycologist. Use shortlists rather than one-off name matches. If you plan to eat a mushroom, require confirmation from a trusted expert or multiple independent sources—never rely solely on a photographic match for edibility decisions.
- Photo sequence: top view, underside, stem base, surrounding habitat (in that order).
- Field checks: smell, bruising test, and non-destructive spore print if needed.
- Decision triggers: visible volva, white spore print, or pore-to-gill differences demand extra caution.
- Final step: cross-check with regional guides or a qualified identifier before any consumption.
Concrete examples of common mushroom types
Agaric example: the classic store-bought button mushroom is an agaric with free gills and a central stem. Wild agarics include many edible and poisonous species; cap color, gill attachment (free vs. attached), and spore print color help separate edible Agaricus species from toxic lookalikes like some Lepiota. In the field, an agaric with white gills and a ring on the stem should prompt careful comparison to Amanita species.
Bolete example: boletes have a sponge-like pore layer under the cap instead of gills. Many boletes are edible, but a subset stains blue when cut and includes species with varying toxicity. Look for a reticulated stem pattern and pore color changes as key identifiers. If a bolete tastes bitter or causes oral irritation when a tiny cooked sample is tried by experienced identifiers, that is a red flag—do not assume edibility without confirmation.
Polypore and shelf fungi example: these grow on dead or living wood and often have persistent, woody brackets or shelves. Their undersides show pores rather than gills. Polypores are usually not mistaken for typical gilled mushrooms but can resemble other wood-decay fungi; substrate tree species and pore surface color are helpful. Puffballs and earthstars are sac-like examples whose interior should be solid white when young; any internal gill tissue indicates an immature gilled mushroom and potential danger.
Lookalike pair example: false morels (Gyromitra spp.) can superficially resemble true morels. True morels have a distinct hollow interior from apex to stem base and a honeycombed cap attached to the stem, while false morels often have chambered or cottony interiors and wrinkled, lobed caps. Because false morels can be toxic, always slice suspected morels lengthwise to inspect the interior before considering them edible.
- Agarics: gills under cap, often with a ring; use gill attachment and spore print to separate similar genera.
- Boletes: pores under the cap, sometimes blue-staining; check stem texture and pore color shifts.
- Polypores: wood-inhabiting shelf or bracket fungi with pores, often persistent and woody.
- Morels vs false morels: inspect the interior—true morels are hollow top-to-bottom.
What photos and field checks can’t guarantee about mushroom types
A photo-based identification narrows candidate groups but does not always reach species-level certainty. Many diagnostic features require microscopic examination (spore size/shape, cystidia) or chemical reagents to reveal staining reactions. Age, weather, and insect damage also change color and texture, which can mislead even experienced identifiers. Treat photographic matches as provisional and annotate what you didn’t capture in photos—missing a stem base or internal structure is a common blind spot.
Health and safety limits: never assume edibility from a visual match alone. Toxic and edible species can be visually almost identical in some genera, and regional variants create additional confusion. If there is any doubt, do not taste or eat the mushroom. For edibility decisions, verification from a local expert, a regional mycological society, or multiple trusted sources is essential. Do not rely on crowd-sourced single-photo answers for consumption advice.
When to escalate: if a mushroom shows Amanita-like features (white gills, ring, volva), unusual bruising, or if a forager experiences symptoms after contact, seek professional verification immediately. Use your photo sequence and field notes to provide a clear record to any expert you consult. If you need a hands-off second opinion, consider using a trusted identification service as an optional next step, but remember that tools and apps should complement—not replace—expert review when safety is at stake.
- High-confidence outcomes: type-level groupings (bolete vs agaric) from clear photos.
- Partial outcomes: likely genus after additional tests like spore print or bruising.
- Uncertain outcomes: lookalikes requiring microscopy or chemical reagents.
- When to verify: volva/white-gilled mushrooms, suspected toxic groups, or planned consumption.
Related guides
Want a practical next step after your visual checks?
If you’ve run the field checks above and want a structured second look, try Fungio’s free photo identification tool as one optional next step: https://mushroomidentification.app/tools/free-mushroom-identifier. Use it to compare candidate types and to organize your photo sequence, but don’t treat a tool result as a final verdict for edibility or safety—follow up with regional guides or an expert when it matters.
Take the next step →Frequently asked questions
What is a mushroom identification guide and when should I use one?
A mushroom identification guide is a structured resource—book, regional key, or vetted online checklist—that outlines field marks, habitats, and distinguishing tests for local species. Use one after you gather photos and notes from the field to run a systematic comparison between your specimen and documented features; it’s especially helpful when your photos show ambiguous traits or when you need to narrow a shortlist to species for safety checks.
How can I use mushroom visual clues to avoid dangerous lookalikes?
Start by isolating the most diagnostic visual clues: underside structure (gills vs pores), the presence of a volva, bruising reactions, and substrate. Photograph each clue and compare them separately—if two mushrooms differ on any single high-value trait (for example, one has a volva and one doesn’t) they are unlikely to be the same species. When a suspected edible has even one conflicting high-value clue, treat it as a potential lookalike and stop.
Can I identify mushroom types reliably from a single photo?
A single high-quality photo can often place a specimen into a broad type—such as bolete versus agaric—but it rarely yields a species-level ID with high confidence. Missing views (underside, stem base) and lack of context (substrate, smell, bruising) are common limits. Use a photo sequence and field notes to increase reliability and only accept single-photo identifications as provisional.
When should I consult an expert rather than rely on photo matching?
Consult an expert whenever the identification affects health or property decisions—most importantly, before eating any wild mushroom. Also seek expert help for specimens with Amanita-like features, ambiguous lookalikes such as false morels, or when microscopy or chemical tests are needed to resolve species-level uncertainty. Provide clear photos, a spore print if available, and habitat notes to speed the expert’s assessment.