
Mushroom Spore Print: How It Helps Narrow an Identification
A practical field guide to using a mushroom spore print to narrow down possibilities, plus which photo clues still matter and what a single print cannot prove.
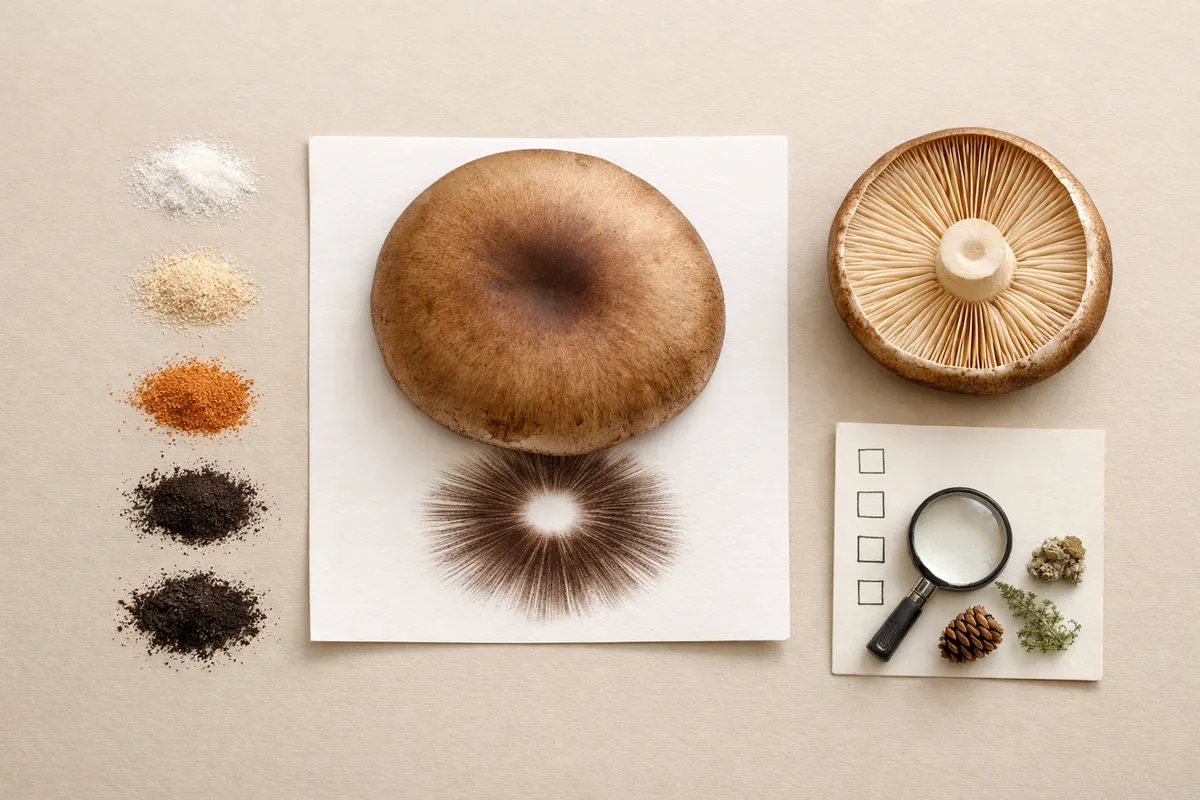
Quick answer for mushroom spore print
A mushroom spore print is one of the most reliable single-field clues you can add to a photo record: spore color often groups fungi at the genus level (for example white, pink, brown, rusty, or blackish spores) and can eliminate many lookalikes immediately. Because spore color is a stable microscopic characteristic that deposits en masse, it’s easier to compare than variable surface color or shine.
That said, a mushroom spore print is supporting evidence, not a proof. Many different species share the same spore color and several environmental or procedural mistakes can change your reading. Treated as one data point among cap shape, gill attachment, stem features, habitat, and odor, a spore print can turn many hundreds of options into a much smaller set worth close comparison.
If you need a quick rule: use spore color to cluster possibilities; use gill attachment, veil or ring presence, and habitat to separate clusters; and reserve species-level claims for micro-details, chemical tests, or expert confirmation.
Strongest visual clues
When you’re collecting a mushroom spore print, some visual clues remain useful even with ordinary phone photos. The most durable clues are those that don’t depend on lighting or camera white balance: spore print color, the deposit’s texture, gill attachment to the stem, the presence or absence of a ring or universal veil remnants, and habitat context.
Spore print color: a dense deposit on paper is easier to read than a faint smudge. White and very pale prints are usually visible on black paper or by looking for contrast at the cap’s edge; cream to brown shades are obvious on white paper. Note the dominant tone—white, cream, pink, light brown, chocolate brown, rusty brown, purple-brown, or blackish—and record whether the print looks homogeneous or mixed.
Gill attachment and spacing: photos of the gill edge and stem junction tell you whether gills are free, adnate, decurrent, or have a notch. Attachment narrows genera more than cap color does: for example, free gills plus a chocolate-brown spore print strongly suggests Agaricus or similar genera, while decurrent gills with a rusty brown spore print point toward Cortinarius or some boletes with brownish hymenial surfaces.
Deposit pattern and context: a circular, even deposit indicates mature, plentiful spores; scattered dots or concentrated lines can indicate interrupted spore release, damage, or contamination from nearby fungi. Habitat notes—wood, leaf litter, grass, or dung—remain among the most decisive clues when combined with spore color.
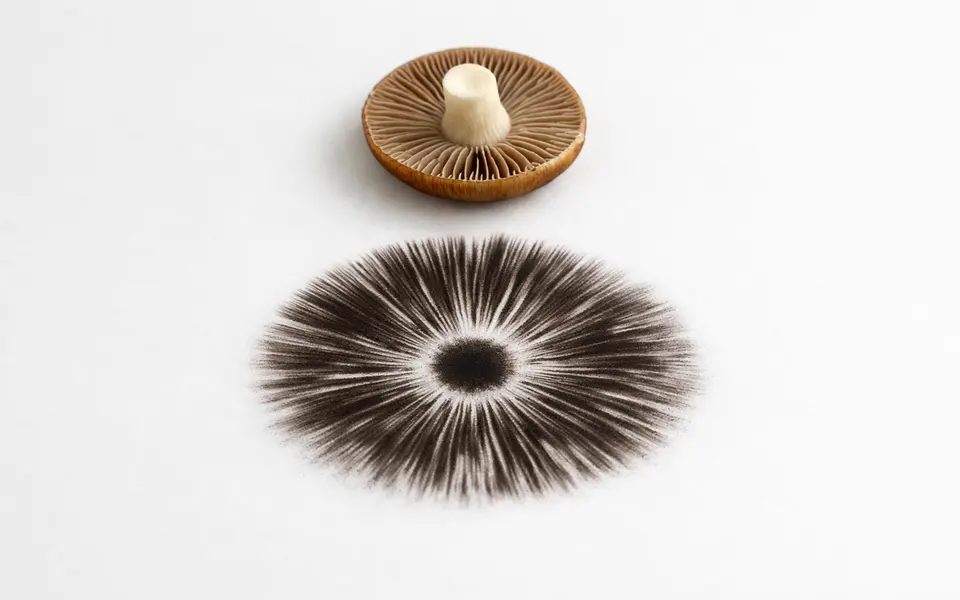
- Spore print color (use both white and dark backgrounds for low-contrast colors).
- Gill attachment and spacing visible in underside photos.
- Presence or absence of a ring, volva, or veil remnants on stem or cap.
- Habitat (substrate, surrounding plants, and weather) to reduce ecological matches.
- Deposit texture: even, powdery, rusty clumps, or mixed colors.
Weak signals
Some clues are tempting but unreliable unless corroborated. Surface cap color changes with age, rain, and sun exposure; glossy or wet caps reflect light and shift perceived color. Relying on cap color alone will lead to common misidentifications—many brown-capped mushrooms span several genera with very different spore colors.
Small smears or faint prints are easy to misread. If the cap released only a light dusting, stray debris, dust, or tiny spores from another species can change the perceived tone. Smudging with fingers or trying to read a print under poor light multiplies error.
Other weak signals include smell as described by non-specialists (many edible and poisonous species share similar odors), single-angle photos that hide gill attachment, and unscaled size estimates without a reference object. Any of these can suggest a direction but should not drive a definitive ID.
- Cap color without underlying field marks (weak by itself).
- Faint, partial, or contaminated spore deposits.
- Relying on smell alone; subjective descriptions are inconsistent.
- Single photos that don’t show gills, stem base, or habitat scale.
- Assuming age or season implies edibility or toxicity.
Comparison workflow
A structured comparison turns a spore print from a single test into evidence that meaningfully narrows candidates. Step 1: document before you disturb the specimen—take photos of the cap from above, the gills from the underside, a close-up of the gill-stem junction, the stem base (dig gently if necessary), and the habitat. Include an object for scale in at least one photo.
Step 2: make the spore print. Place a fresh cap, cut from the stem, gill-side down on a sheet of half-white, half-black paper or use two sheets of contrasting color. Cover with a jar or bowl to reduce airflow and leave 4–12 hours or overnight. Record time, weather, and whether you refrigerated the cap before testing.
Step 3: record the spore deposit as you see it under natural light. Photograph the print at both close and slightly oblique angles, and note whether the color appears uniform or layered. If the print is very pale, try a dark background; if very dark, use white paper. Add gill attachment, presence of veil or ring, bruising reactions, and substrate to the same record.
Step 4: form hypothesis clusters by spore color and gill attachment. For example: chocolate-brown spores + free gills + ring → likely Agaricus or allied genera; rusty-brown spores + decurrent gills + woodland substrate → Cortinarius or some Inocybe species; pink spores + dark gills + grass habitat → Entoloma or Pluteus for many cases. Then check field guides or verified keys for matching morphological combinations.
Step 5: use micro- or chemical tests only when necessary and when you have training or lab access. Many species require microscopic spore shape, ornamentation, or reaction to reagents for a secure species-level identification; accept that the spore print often narrows to a small set of candidates rather than a single name.
- Document: cap, underside, gill-stem junction, stem base, and habitat with scale.
- Print: place cap on contrasting paper, cover, and wait 4–12+ hours.
- Record: photograph the print in natural light and note uniformity or mixed tones.
- Cluster: group candidates by spore color and gill attachment before checking guides.
- Confirm: reserve species-level claims for microscopic or expert verification.
App workflow
After you’ve collected photos and a spore print, use a systematic logging approach in Mushroom Identifier: Fungio to keep details searchable and comparable. Create a new observation and attach the cap/top photo, clear gill underside, stem base, habitat context, and a photo of the spore print on a contrasting background. In the notes field, add the spore color, whether prints were homogeneous or mixed, gill attachment, substrate, and the approximate size.
Tag features that matter: free or decurrent gills, ring present, volva visible, bruising color, and habitat type (conifer, hardwood, lawn, dung, etc. ). These discrete tags let the app surface similar records faster than free-text descriptions. Treat the app as a research tool that helps you compare past observations and literature, not as final verification.
When you want deeper context, consult a full visual checklist such as Mushroom Identification Guide: Cap, Gills, Stem, Habitat, and Spore Print to cross-check each field mark. That guide collects the same set of clues in one place and is a helpful reference when your spore color clusters produce several candidate genera.
Keep safety in mind: do not use the app or a spore print alone to decide edibility or toxicity. Record keeping strengthens later verification from a mycologist or lab, and a clear, time-stamped spore print plus photos will materially improve any expert review.
- Attach photos: cap, underside, stem base, habitat, and spore print.
- Note discrete fields: spore color, gill attachment, substrate, ring/volva presence.
- Tag observations for search and comparison across your record library.
- Use Fungio to organize evidence, but seek expert confirmation for species or safety decisions.
Related guides
Record spore color and field marks in Fungio
Use Mushroom Identifier: Fungio to attach your cap and gill photos, log spore color, gill attachment, and habitat notes—so your observations are organized for later comparison or expert review. Start on the homepage: https://mushroomidentification. app/.
Take the next step →Frequently asked questions
How do I make a reliable mushroom spore print in the field?
Cut the cap cleanly from the stem, place gill-side down on contrasting paper (half white, half black if possible), cover with a jar or bowl, and leave it undisturbed for several hours or overnight. Photograph the print in natural light and note the time and weather; avoid touching the deposit and keep contaminants away.
How long should I wait before reading a spore print?
Wait at least 4 hours for a visible deposit; overnight is safer for faint-sporing species. Some mushrooms need more time under cool, still conditions. If the deposit is faint, try a dark background if it’s pale, or white paper if the deposit is dark.
Can a spore print identify a mushroom species on its own?
No. A spore print narrows possibilities—often to one or several genera—but many species share spore colors. Use the print together with gill attachment, cap and stem features, habitat, and, when necessary, microscopic or chemical tests to reach a reliable identification.
What do common spore colors usually indicate?
Broadly: white or very pale prints are common in Amanita, Tricholoma, and others; pink prints often point to Entoloma or Pluteus; brown to chocolate-brown is typical for Agaricus and many saprotrophs; rusty brown suggests Cortinarius or some brown-spored wood-inhabiting genera; blackish prints are seen in some polypores and inkcaps. These are starting points, not definitive labels.