
Mushroom Types and Pictures: Identifying Fungi from Photos
Discover which mushroom types and pictures provide reliable clues, which require follow-up checks, and how to collect photos that help identification.
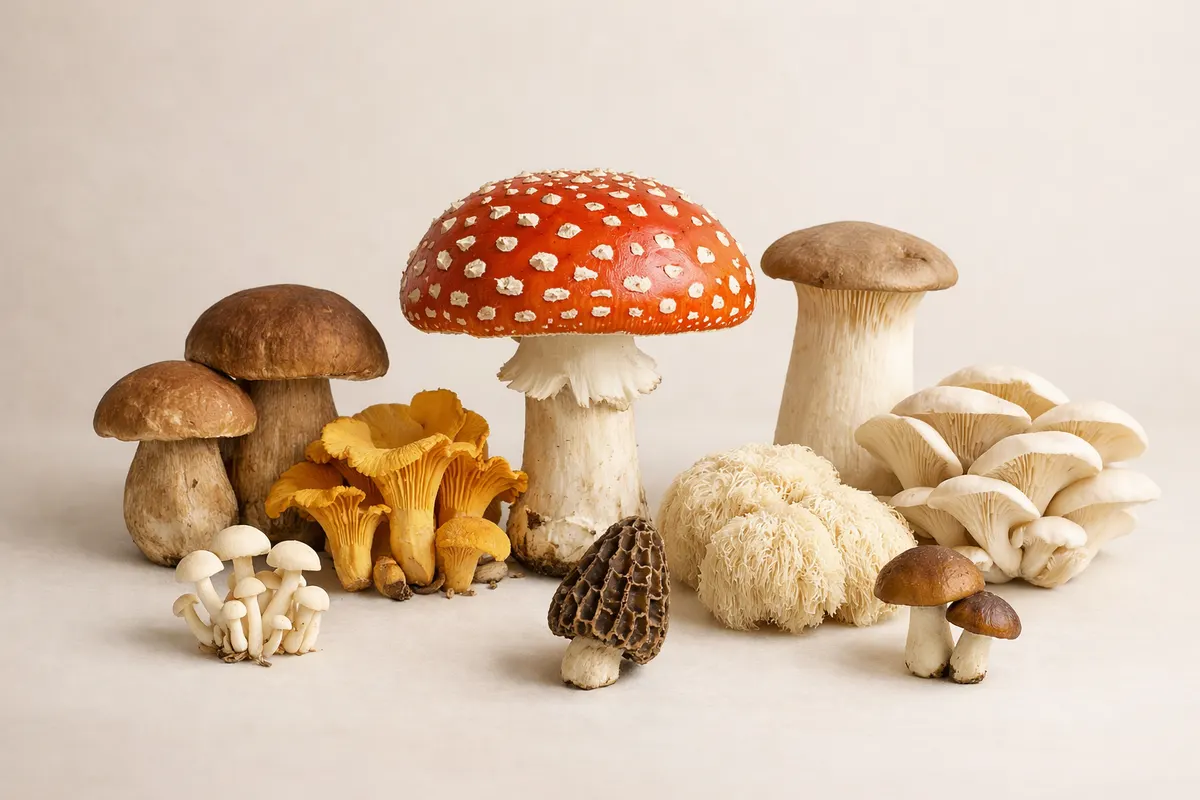
Quick answer for mushroom types and pictures
Mushroom photos can usually narrow possibilities to a small group — for example, ‘small brown lawn mushrooms’ or ‘white gilled button mushrooms with a ring’ — but rarely confirm a single, certain species. Clear, well-composed pictures of the cap, gills or pores, stem, and habitat let an experienced identifier or an app prioritize likely types, not guarantee them.
High-confidence visual IDs are possible when the species has a distinctive, easy-to-see combination of field marks: think chanterelles (for their forked ridges and apricot scent), morels (honeycombed caps and hollow body), or bracket fungi with characteristic shelf layers. For many common woodland mushrooms, photos plus habitat and a spore print can be enough to reach a confident ID.
However, small differences — gill attachment, subtle cap texture, bruising color, odor, or microscopic features — are often invisible in a single photo. That means photos are best treated as a rapid triage: they show what’s likely, what to avoid, and which follow-up checks to run before you taste, sell, or attribute toxicity.
- Photos help classify by gross type (gilled vs. pore, cap shape, color patterns).
- Some species can be reliably recognized from photos when field marks are obvious and the habitat matches.
- Many edible vs. poisonous distinctions require follow-up (spore print, bruising, smell, expert verification).
How to read “mushroom types and pictures” as a search
People searching for mushroom types and pictures usually want two things: examples that match what they found, and practical guidance on which photos to take next. The question blends visual identification with action: readers expect help turning an image into a safe, evidence-based conclusion.
For identification purposes, a ‘type’ is a practical grouping based on visible traits: gilled mushrooms (agarics), boletes (pores under the cap), polypores (shelf-like), cup fungi, puffballs, and so on. When someone asks about ‘mushroom types and pictures,’ they’re often asking which photo angles or details will move an ambiguous picture closer to a reliable identification.
That intent explains why a useful guide pairs photo examples with checklists and next steps. A single photo from above might make a cap pattern obvious but leave gill attachment, stem base, or bruising unknown — and those missing details are often the decisive clues between two lookalikes.
This article treats the query as educational: it shows what images can reveal, the common categories photos resolve well, and precisely which additional pictures or tests matter when the stakes are eating, selling, or documenting rare finds.
- Searchers want both visual examples and usable photo checklists.
- ‘Types’ are practical visual groups — not always final species names.
- Missing underside, scale, or habitat photos are the most common reasons IDs remain uncertain.
Key photographic clues that narrow mushroom types
Some visual clues are far more diagnostic than others. A photo that documents cap texture, gill or pore structure, stem features, and surrounding substrate gives a strong foundation for identification. Below are the field marks to prioritize when your goal is to reduce the range of candidate species.
Capture these clues deliberately: take one clear top-down cap shot, one close-up of the cap edge and surface, an underside image of the gills or pores, a full-length side view showing stem and base, and at least one picture of the immediate habitat. Each of these angles answers a different identification question.
When possible, record scale (a coin, ruler, or a finger), note the substrate precisely (deciduous leaf litter, conifer needle bed, lawn, rotted log, manure), and mention the exact location and date. Habitat and season often rule out many species that look similar but prefer different conditions.
- Cap surface: texture, sticky/slimy layer, scales, zonation, color gradients.
- Underside: gills (free, attached, crowded), pores, or teeth — that single shot often cuts options drastically.
- Stem: presence of ring, volva or bulb at base, fibrous vs. smooth texture, hollow vs. solid.
- Bruising and color change: photograph any color change after handle or cut (blueing, yellowing).
- Spore color hint: a well-lit spore deposit (spore print) helps — photo the print on black/white paper.
- Habitat and substrate: type of wood, soil, or whether the specimen grew from dung or grass.
- Size and scale: include a small object for scale; size often separates lookalikes.
- Grouping and growth pattern: solitary, clustered, fairy ring formation, or shelf-like on wood.
Step-by-step workflow
Treat photo-based identification as a three-stage workflow: document, triage, then verify. Documentation focuses on collecting the best possible photos and notes; triage uses those images to narrow to a handful of types; verification uses follow-up checks to raise confidence or defer to experts.
Start with documentation: take multiple, sharp images from the angles listed earlier. Photograph the underside immediately after picking (if you collect) because gill spacing and attachment can change as the mushroom dries or is handled. Always respect local foraging rules and do not collect protected species.
Next, triage the likely group. Use visible features and habitat to classify into broad types (for example: bolete vs. agaric vs. polypore). This is where image-based tools or community forums help — they can suggest likely genera and point out lookalikes. Keep in mind these suggestions are hypotheses, not confirmations.
Finally, verify before any risky action. Verification can include making a spore print (laid on paper, photographed), noting bruising reactions over 10–15 minutes, checking smell, and when necessary, consulting a local expert or a mycological society. If the mushroom will be eaten or sold, err on the side of independent, expert confirmation.
- Document: cap (top), cap edge, underside, stem (including base), habitat, and scale.
- Triage: group visually (gilled, bolete, polypore), compare with reliable field photos.
- Verify: spore print, bruising test, smell note, consult an expert for final confirmation.
- If using an app, treat its result as a prioritized hypothesis and double-check high-risk IDs.
Examples
Example 1 — Chanterelle-like find in leaf litter: A golden, funnel-shaped mushroom with blunt ridges could be a chanterelle or a lookalike such as the false chanterelle. Useful photos: close-up of the ridges (showing whether they fork), underside detail, stem attachment to the substrate, and the surrounding leaf litter. A smell note (apricot-like) and season help confirm the ID. For more on cap outlines and shapes, consult the cap shapes guide (Mushroom Cap Shapes: Convex, Bell, Flat, and Funnel Clues: https://mushroomidentification.app/blog/mushroom-cap-shapes).
Example 2 — Small brown mushrooms in a lawn: Many small brown mushrooms are notoriously difficult to ID from photos alone. Take strong macro shots of the gill spacing and attachment, a stem base image (dig gently to show any bulb or volva), and a habitat shot showing nearby grasses and soil. Often these photos will only narrow to a handful of genera, after which a spore print and microscopic features are needed.
Example 3 — Bracket fungus on a log: Shelf or polypore fungi frequently reveal enough in photos to reach genus-level IDs because their pore surface, zoned coloration, and growth form are distinctive. A series of photos showing the entire shelf, close-ups of pore size and color, and the wood type (hardwood vs. conifer) is usually sufficient for confident, low-risk identification.
Example 4 — False morel vs. true morel: These can look similar in the field. Photograph the interior by slicing one specimen lengthwise; true morels are hollow from cap to stem, whereas false morels are chambered or solid. Combine that with a clear image of the cap texture and a habitat note (disturbed soils vs. near hardwoods) for a much safer preliminary judgment.
- Chanterelle vs. false chanterelle: underside ridges and smell matter most.
- Small brown lawn mushrooms: photos often need spore prints to progress beyond genus.
- Bracket fungi: photos of the pore surface and wood substrate often give genus-level clarity.
- Morel checks: interior hollow vs. chambered is decisive; photograph a cross-section.
Limitations: when pictures aren’t enough and safe next steps
Separate the outcomes your photo workflow can deliver: high confidence, probable, and uncertain. High-confidence IDs come when a species has strong, visible, and distinctive field marks plus matching habitat and season. Probable IDs are reasonable when most but not all diagnostic details are visible; these should prompt follow-up checks. Uncertain outcomes occur when key diagnostic features are missing or when dangerous lookalikes exist — in those cases, do not rely on photos alone.
Many toxic vs. edible distinctions hinge on subtle features or chemical reactions invisible in photos. For example, some deadly Amanita lookalikes differ in the presence of a volva or in microscopic spore shape. Because of that, never consume a mushroom based solely on an app result or a single photo, even if the image looks convincing.
When photos leave you in the uncertain category, use conservative next steps: take the specimen to a local mycological society or extension service, make a spore print, and keep notes on location and substrate. If you must act quickly (for example, a suspected poisoning), contact local poison control and keep any remaining mushroom material for identification — do not force certainty from images.
Finally, be aware of legal and ethical limits: some rare or protected species should not be collected, and many jurisdictions restrict foraging in public lands. Photos are an excellent non-destructive way to document finds; when in doubt, prioritize preservation over collection.
- High confidence: distinctive species with clear field marks and matching habitat.
- Probable: most features visible but still lacking a confirmatory test (spore print, microscopy).
- Uncertain: key diagnostic features missing or dangerous lookalikes present — seek expert verification.
- Safety rule: never eat a mushroom based only on photos or a single app-generated ID.
Related guides
Use Fungio as a fast first check when you have photos
When you’ve followed the photo checklist, Fungio can quickly prioritize likely mushroom types from your images so you know which follow-up checks matter most. Use the app on iOS to scan photos from your phone, compare suggested field marks, and get next-step guidance — then confirm high-risk IDs with a spore print or a local expert. Treat the app as the fastest way to act on mushroom types and pictures, not as a final authority.
Take the next step →Frequently asked questions
Can I identify a mushroom species from a single photo?
A single photo can sometimes identify a mushroom to species if the species has very distinctive, visible features and the habitat matches (for example, some polypores or morels). But most mushrooms require multiple photos (cap, underside, stem base), habitat notes, and often a spore print or expert check to reach a reliable species-level identification. Treat a single-photo ID as a helpful hypothesis, not proof.
What are the most important photos to take for identification?
Capture a clear top view of the cap, a close-up of the cap surface and edge, a photo of the underside (gills, pores, or teeth), a full-length side shot of the stem including the base, and at least one habitat shot showing substrate and nearby plants. Include a scale object (coin or ruler) and note date and precise location. Those six images answer most diagnostic questions for field identification.
How accurate are mushroom ID apps that use photos?
Mushroom ID apps can be useful triage tools: they quickly prioritize likely genera and highlight lookalikes. Their accuracy varies with the quality and angles of photos, the species in the model’s training data, and how distinctive the target fungus is. Use app results as a starting point, then confirm with spore prints, bruising tests, scent notes, and expert consultation—especially before eating or selling.
If I find a mushroom I think is poisonous, what should I do?
If poisoning is suspected, do not wait on photo IDs. Call local emergency services or poison control immediately and preserve a sample (if safe) for medical or expert analysis. Photograph the specimen in place, note the time and location, and keep any remaining material in a sealed container; do not handle contaminated materials more than necessary. For non-urgent concerns, record photos and habitat notes and consult a local mycological society for guidance.