
Orange Mushroom Identification: Color, Gills, Cap, and Habitat
Learn which orange mushroom identification details a photo can prove, which it cannot, and the follow-up checks worth doing before you rely on the answer.
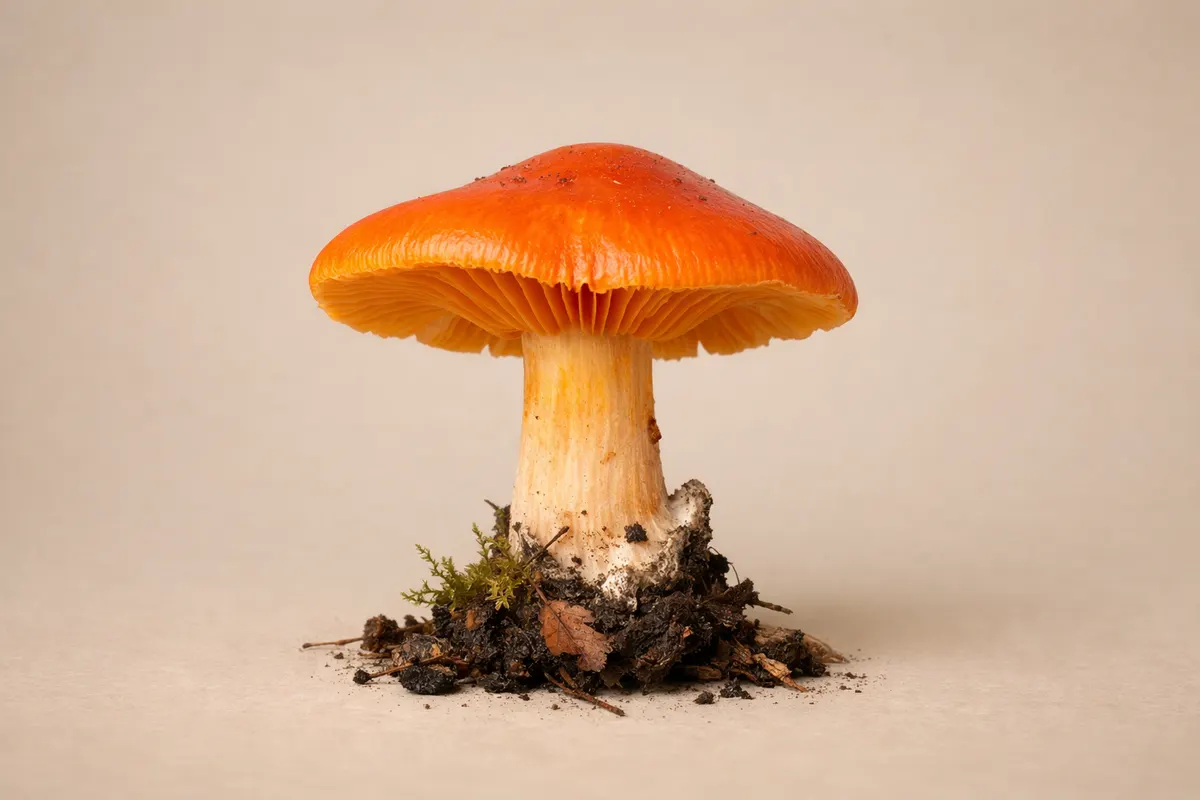
Quick answer: what photos can show about orange mushrooms
Orange mushroom identification is possible to a useful degree from photos, but a single image rarely proves a species. Photos reliably show several field marks—cap color and texture, gill vs ridge structure, whether the cap is funnel-shaped or convex, growth substrate (wood, soil, moss), and whether mushrooms grow singly or in clusters. These visible clues let you narrow possibilities and rule out obvious lookalikes.
Start your visual checklist by noting whether the orange mushroom has true gills, blunt ridges, or crowded fibrous folds. For example, chanterelles (yellow-orange) have forked, blunt ridges that run down the stem (decurrent ridges), not the knife-thin gills of many toxic lookalikes. Conversely, a bright orange cluster growing on wood with sharp, knife-like gills is more suggestive of Omphalotus (jack‑o'‑lantern) or similar wood‑loving species.
Photos cannot prove edibility, toxicity, or a definitive identification alone. Spore print color, microscopic features, chemical reactions, and habitat timing are common follow-ups that often require physical handling or lab work. Treat photo-based findings as a short list of candidates and next actions rather than a final label.
- Photos reliably show cap shape, gill structure, substrate, and growth pattern.
- True gills vs ridges is one of the strongest single clues in orange mushroom identification.
- Color can mislead: lighting, moisture, and age change orange tones quickly.
- Use photos to create a shortlist and plan safe next checks (spore print, latex, substrate).
Strong clues to inspect in orange mushroom photos
When prioritizing evidence for orange mushroom identification, focus on structural features that survive exposure, angle, and camera auto-corrections. Start with gill morphology: are the gills knife‑thin, crowded, and attached to the stem (adnate, adnexed, or decurrent)? Or are they blunt, forked ridges that run down the stem (decurrent folds)? This distinction alone separates many chanterelle-like species from genuinely gilled fungi like the jack‑o'‑lantern (Omphalotus) or false chanterelles (Hygrophoropsis).
Next, record the substrate and growth habit. A bright orange mushroom fruiting in dense clusters on hardwood is a different candidate set than a single mushroom pushing up from moss or grass. For example, Omphalotus species often fruit in clusters on rotten wood or tree bases, while Cantharellus (chanterelles) form solitary or scattered fruiting bodies on soil in leaf litter or moss, usually under trees.
Cap texture and shape provide stable clues. Note whether the cap is smooth, scaly, viscid (slimy when wet), or zoned with concentric rings. A convex cap that becomes depressed or funnel-shaped with age points toward some chanterelles and certain waxcaps; a slimy, sticky cap suggests hygrophanous species. Always photograph the cap from above and from a low angle to capture margin shape and center texture.
Stem and base details matter: presence of a bulb, curled volva, ring, or rootlike mycelial strands can eliminate several candidate groups. If possible, photograph the stem base by gently clearing debris (without digging extensively). Also look for surface features such as latex exuded when the flesh is cut (saffron milk cap, Lactarius deliciosus, for example, exudes orange latex) or a velvety stem (Flammulina velutipes) which are diagnostic in many orange species.
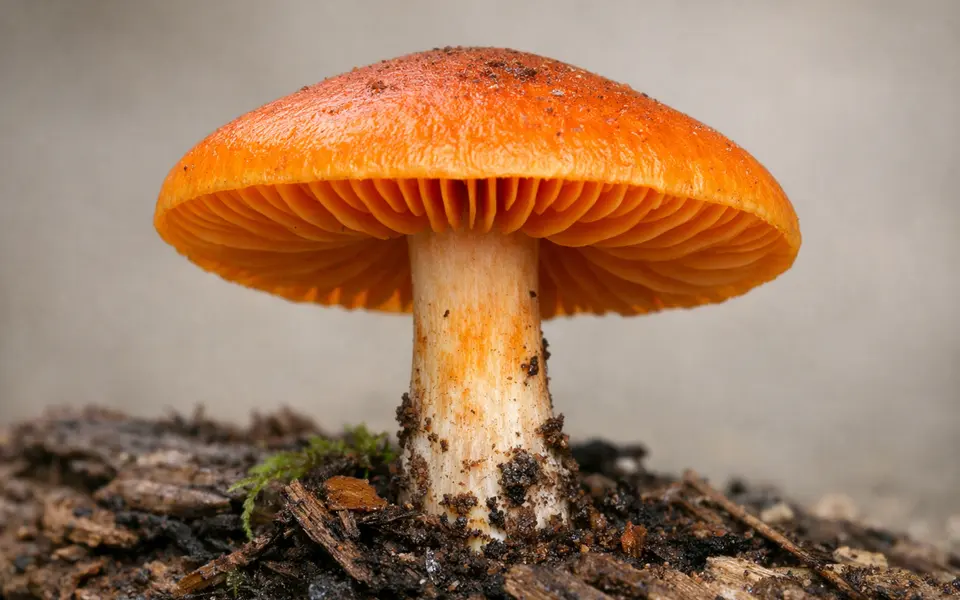
- Gill type: true gills vs forked ridges — top discriminant for orange mushrooms.
- Substrate: wood (clusters) vs soil/moss (solitary or scattered).
- Cap texture: viscid, scaly, zoned, or smooth; note age-stage changes.
- Stem features: ring, volva, bulb, latex, velvety or fibrous surface.
- Growth pattern and cluster density: single, scattered, or densely clustered.
Weak signals: what photos often mislead about orange mushrooms
Color alone is one of the weakest signals in orange mushroom identification. Camera white balance, sunlight, camera phone saturation, wetness, and aging can shift orange tones from pale peach to deep pumpkin within hours. Two species with similar pigments can look identical in bright midday sun or completely different under clouded, shady forest light. Use color as a supporting clue only after checking structural marks.
Surface sheen and reflected highlights often look like pigment. A wet cap looks darker and more saturated than a dry one; a powdery bloom can make a cap appear paler. Gloss from recent rain can hide scales or zonation that would otherwise be visible. Also beware of glare overexposing the cap center—take a shaded close-up when possible.
Single-angle shots miss critical features. A top-down photo might show attractive color and shape but hide gill attachment, stem base, and whether the stem is hollow or solid. Decayed or insect‑damaged specimens are also poor evidence: slumping caps, missing gill sections, and insect tunnels change field marks and can create false matches.
Scale without reference is unreliable. A tiny Flammulina cluster and a large Omphalotus can both read 'orange cluster' in a photo without a coin, ruler, leaf, or hand for size reference. Size rules out or supports species—omit it at your peril.
- Color shifts with light and moisture—don’t rely on hue alone for identification.
- Glare and reflections can hide textures and gill structure.
- Single-angle photos often miss gill attachment and stem base details.
- Damaged, insect-eaten, or decayed specimens give misleading clues.
- No scale reference makes size-based comparisons speculative.
Step-by-step comparison workflow for orange mushroom ID
Turn photos into a defensible shortlist by combining multiple clues in a fixed order. First, record ecological context: substrate (wood vs soil), surrounding vegetation (conifers, hardwoods), and whether mushrooms are clustered. Ecological context narrows the candidate pool dramatically—some orange species are obligate wood‑decayers, others form mycorrhizal relationships with specific trees.
Second, sort by gill architecture and cap form. Create two groups: gilled mushrooms with distinct, knife-like gills, and mushrooms with blunt ridges or folds. Within each group, compare cap shape (convex, umbonate, depressed, funnel-shaped) and texture (viscid, scaly, zonate). For instance, a funnel-shaped cap with decurrent blunt ridges points strongly toward chanterelle relatives; a bright, clustered wood‑growing mushroom with thin, closely spaced gills favors Omphalotus or Hygrophoropsis.
Third, add stem and surface clues: latex when cut, bruising color, velvety stem surface, presence of a ring or volva. Latex that stains or changes color (as in Lactarius species) is diagnostic for some saffron and milkcaps; bruising blue, green, or red on the stem or gills is an equally strong diagnostic sign when present. Photograph any color change over several minutes to show delayed reactions.
Fourth, plan practical follow-ups for the top candidates. A spore print (color) is often decisive between lookalikes; for example, Cantharellus species make a pale yellow to white spore print, while many Omphalotus have white to pale spore prints too—so pair spore print with gill detail and substrate. When spore print and photos still leave ambiguity, seek local expert verification or lab work rather than escalating consumption risk.
- 1) Record habitat and substrate first to narrow candidate sets.
- 2) Sort by gill type: true gills vs forked, blunt ridges.
- 3) Compare cap shape, texture, and stem surfaces across candidates.
- 4) Use latex, bruising, and spore print as planned follow-ups.
- 5) Treat the app or photo ID as a research note—confirm before any risky use.
How to use Mushroom Identifier: Fungio after your photo checklist
After you've gathered photos and notes, use Mushroom Identifier: Fungio as a structured research tool to organize evidence and generate likely matches. Start by uploading or scanning the best-angle photos inside the app: a top view of the cap, one or two side views showing the gills or ridges, a close-up of the stem and base, and a habitat shot that shows substrate and nearby trees. Label each photo with location, date, and substrate so the app can pair visual clues with context.
Treat Fungio's suggestions as prioritised leads, not final verdicts. The app can quickly surface candidate species that match visible traits and common habitats, which helps you decide which physical checks to run—spore print, latex test, or microscopic work. When an app result points to a potentially risky lookalike, stop and follow the next-step checklist: take a spore print, document bruising over time, and if still uncertain, consult a local mycological society or trained identifier.
If Fungio suggests multiple plausible matches, use the app's comparison view (if available) to line up field marks side-by-side: cap margin, gill attachment, substrate, and stem features. Mark any uncertain traits in the app as research flags—features the app should not treat as definitive. This preserves transparency about what you observed versus what you inferred.
Finally, keep records: save the best photos and your shortlist, and note which follow-ups you performed and their results. A well-documented observation with photos, spore print, and a habitat note is far more useful to experts and safer for decision-making than a single unverified photo.
- Scan and label several photos: cap top, underside, stem/base, and habitat.
- Use Fungio's suggestions to prioritize which physical checks to run next.
- Mark uncertain features in the app to distinguish observation from inference.
- If a suggested match is risky, stop, run a spore print, and consult experts.
- Keep a dated, photo-backed record of what you observed and tested.
Related guides
Use Mushroom Identifier: Fungio to organize your orange mushroom research
After you check cap shape, gill type, substrate, and stem details, open Mushroom Identifier: Fungio to scan your labeled photos and generate prioritized candidate matches. Treat app suggestions as research notes—use them to plan spore prints, latex or bruising tests, and expert checks rather than as final proof. Keep careful records (photos, spore prints, habitat notes) so you can share a complete observation with a mycological society if needed.
Take the next step →Frequently asked questions
Can I identify an orange mushroom as edible from a photo?
No. A photo can narrow possibilities but cannot prove edibility. Many edible orange species have dangerous lookalikes distinguished only by spore print, microscopic features, scent, or subtle stem-base structures. Use photos to make a shortlist and then perform physical checks or consult a trained identifier before considering consumption.
What are common orange mushroom lookalikes to watch for?
Common lookalikes include chanterelles (Cantharellus) versus the false chanterelle (Hygrophoropsis aurantiaca), and edible saffron milk caps (Lactarius deliciosus) versus other orange milkcaps or similar-capped species. Jack‑o'‑lantern mushrooms (Omphalotus) resemble some edible orange fungi but are wood‑dwelling and have true gills—check substrate and gill structure carefully.
Which single photo angles give the most useful clues?
Take these four: a top-down shot of the cap to show shape and color; a side view that clearly shows gill attachment or ridges and cap margin; a close-up of the gills/ridges and stem surface; and a habitat photo showing substrate and nearby trees. Add a photo with a size reference (coin or ruler) and a close-up of the stem base if possible.
How should I collect a spore print to support an orange mushroom ID?
Place the cap, gills or ridges down, on white and dark paper (half-and-half) for 4–12 hours in a covered container to protect from drafts. Note the spore print color and photograph it. Spore color combined with gill type and substrate helps narrow species; handle mushrooms gently and avoid tasting.